Effective Steps for Surveillance Video Recovery After an Explosion
Overview
In the field of public security, surveillance video investigation refers to an investigative measure used by investigative agencies to discover and identify criminal suspects, search for clues to solve cases, and provide direction for case investigation. Criminal dynamic analysis can be achieved through the four links: retrieving, viewing, analyzing and applying video surveillance data. Case investigators can easily obtain first-hand information through video evidence. This includes information such as the suspect’s physical characteristics, behavioral patterns, the conditions of the crime scene, and the time of occurrence. After the case investigators can organize these clues and make sufficient preparations for the next action.
Surveillance Video Investigation Processes
In general, surveillance video investigation can be divide into 5 processes:
1. Video Collection
First, investigators need to collect relevant surveillance videos. This can be done by obtaining a video storage device, contacting a surveillance video provider, or obtaining video from a public location. Make sure the collected videos are complete and have not been tampered with or edited.
2. Video Conversion
The collected surveillance video is converted into a format suitable for analysis by investigators. This can be done by using professional video conversion tools. The converted video should have good clarity and observability so that investigators can accurately identify key details and behaviors.
3. Video Editing
Make necessary cuts and edits to the video based on the needs of the investigation.This can help investigators focus on observing and analyzing the relevant parts of the case. The edited video should have a clear time stamp and sequence of events to facilitate subsequent analysis and report writing.
4. Video Analysis
Carefully analyze the edited video. Investigators should pay close attention to character traits, behavior patterns, time clues, and other details relevant to the case. They can use techniques such as slowing down videos, zooming lenses and enhancing images to help identify and analyze key information.
5. Results Output
Collate important findings and key evidence based on the results of video analysis. These results should be documented in writing and shared with other investigators and relevant authorities. Ensure the accuracy and reliability of the results so that they can be used as court evidence or support for security decisions when needed.
Particular attention needs to be paid to the video collection process, which includes surveillance video working status, operation logs, coverage, time calibration, media information, etc. Only by completing the video collection accurately can subsequent viewing and analysis work be carried out.
Case Study
Let’s take an example of the surveillance video recovery and extraction after an explosion as a case. In this case, the internal data hard disk of the surveillance video may be damaged by high temperature, water damage, shock damage, etc.
- Inspection material: Surveillance Video
- Tool 1: DRS Data Recovery System
- Tool 2: VIP 2.0 Video Investigation Portable
Specific steps are as follows:
Step 1. Video surveillance processing
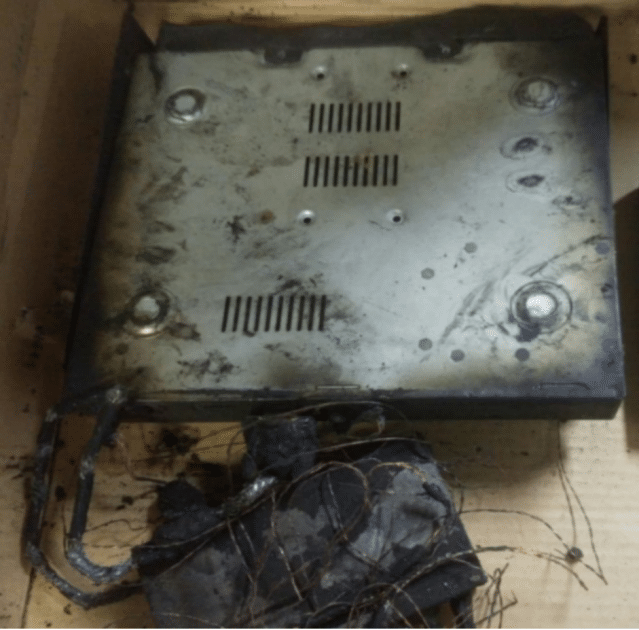
By checking the status of the surveillance video, investigators found it was severely damaged, and no way to directly power on the surveillance to view videos, logs and other information. The monitoring personnel informed that there was no significant time difference between the video surveillance time and local time, so they decided to directly disassemble the monitoring hard drive for analysis.
Step 2. External processing of hard disks
After removing the monitoring hard drive of the surveillance video, investigators found the monitoring hard drive was not seriously damaged. The label of the hard drive is vaguely visible, and the most important circuit board on the outside has slight burn marks.
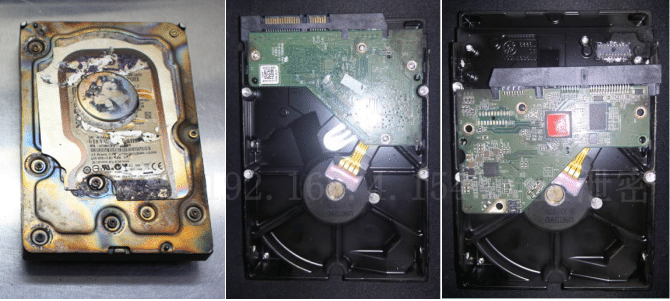
Step 3. Circuit board processing of the hard disk

When remove the circuit board, there was water stain inside. After drying treatment, they replaced the circuit board of the faulty disk with the accessory disk for testing. However, the circuit board of the faulty disk was damaged because it would not rotate when power was turned on.Use tools to replace the ROM chip on the faulty disk to the circuit board of the accessory disk, and then connect the replaced circuit board to the accessory disk for testing. There will be feedback during the power-on test.
Step 4. Internal processing of the hard disk
In the clean room, a special hard disk opening tool HPE from SalvationDATA was used to open the disk. It was found that there was no water stain inside the disk cavity, the physical condition of the magnetic head inside the hard disk was normal, the disk was not damaged, and there was no obvious damage to other structural parts. (If the magnetic head is damaged, you need to replace it with a new one, and if the disk is seriously damaged, the possibility of data recovery is very low).
Step 5.Hard disk power detection
Install the circuit board after replacing the ROM onto the original hard disk, and use DRS Data Recovery System to power on the hard disk for testing. It was found that the hard disk can be recognized normally. There are some bad sectors in the middle of the hard disk storage, but there are no problems with hard disk data access.
Step 6. Disk data imaging
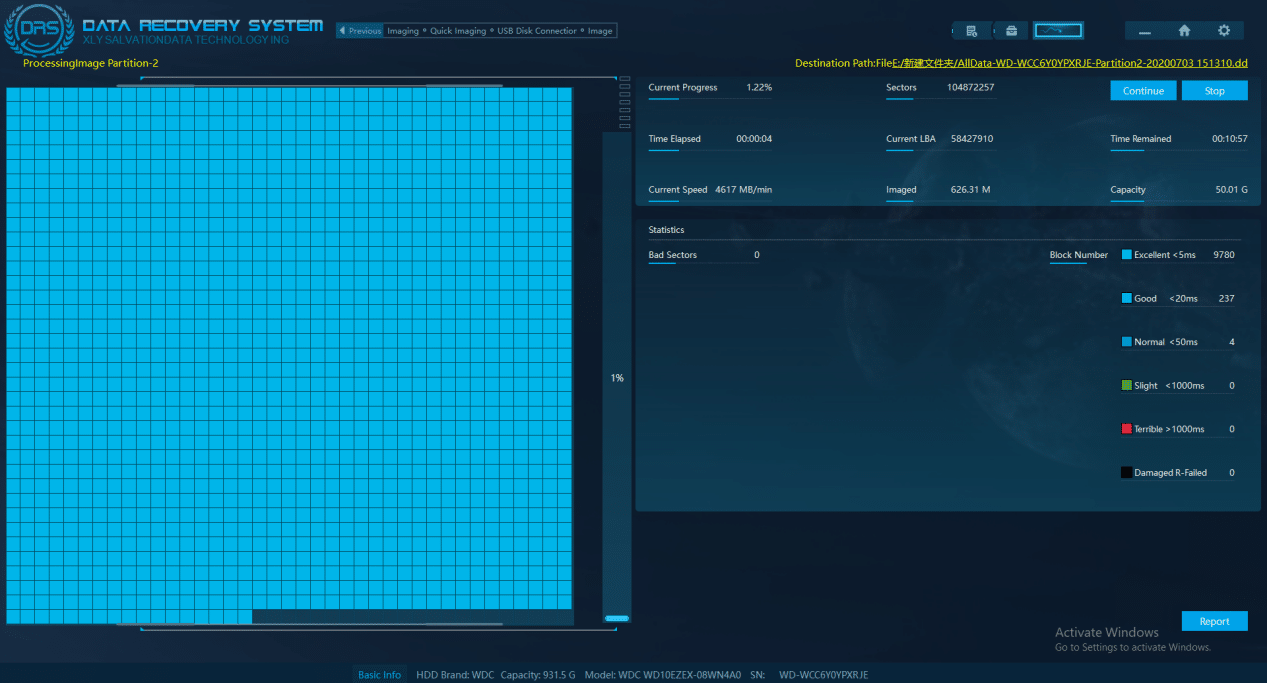
After repair, the hard disk needs to be read for a long time, and the probability of damage is particularly high. In order to reduce this risk, use DRS Data Recovery System to perform data imaging operations on the original media to reduce reading of the original media.
Step 7. Data extraction of the hard disk
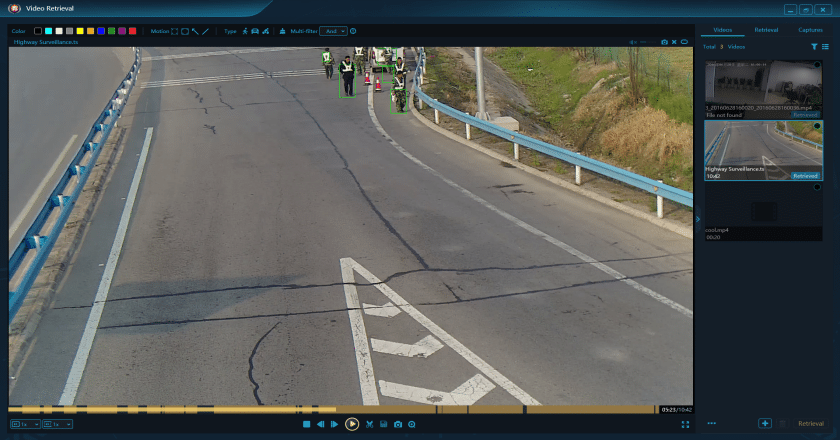
After completing the data mirroring, use VIP 2.0 to parse the image file. After loading the image file, VIP 2.0 can automatically obtain the channel information, time information, size and other information of each video file. Select the surveillance video files of the required time period to download, extract and restore.
Step 8. Video analysis and report output
Play the extracted surveillance video files. Through technical analysis, the cause of the explosion was successfully found. Export the data mirroring report of DRS Data Recovery System and the surveillance video extraction report of VIP 2.0, and issue this inspection report based on the analysis and processing.
Tips
- For this kind of hard disk with some water problem, remember that it can not be directly powered on;
- Need to detect the hard disk hardwareatfirst, and see if there is a problem with the hard disk that is necessary to replace the hardware;
- If there is an operation such as replacing the magnetic head, and thebestway is to image the source disk directly to prevent the hard disk from being damaged again.
- Data imaging software and surveillance video extraction & recovery software the better way is to choose professional software, such as SalvationDATA ‘s DRS and VIP 2.0.


