FAS7900 – A streamlined forensic acquisition system for fast, non-invasive data extraction and analysis, without the need for computer disassembly. Supporting multiple OS, it captures memory and disk images, and includes secure data wiping.
Forensic Expansion Dock – A compact solution for fast, reliable data acquisition from various storage media. With support for multiple interfaces, it ensures secure, stable, and high-speed forensic data transfer for streamlined workflows.
SPF Pro Beginner Tutorial – Mobile Forensics (Step-by-Step)
Product Tips
2022-08-30
Before we could dive deep into mobile forensics practice, there is an initial preparation we should do, which is to understand the application of a professional mobile forensic tool.
Today, within minutes, we’re going to walk you through the essential practice of SalvationDATA’s most industry-grade mobile forensic tool, SPF Pro(SmartPhone Forensic System Professional).
After following today’s instructions, you’re definitely good to take actions and cope with your actual mobile forensics cases more effective.
To actually begin using mobile forensics SPF Pro, initially giving it a rough idea about its dashboard is going to make it easier before actual practice.
Interface: When firstly open up the software, you’ll see the main interface of SPF Pro that primarily shows 2 buttons, “New Case” and “Open Case”.
New Case: By clicking “New Case”, you’ll be creating a new case file specifically.
Open Case: However, if there is an existing case file, you’re supposed to click “Open Case” to load your historically existing files.
How to Create a New Case?
To show you the overall workflow, let’s create a new case.
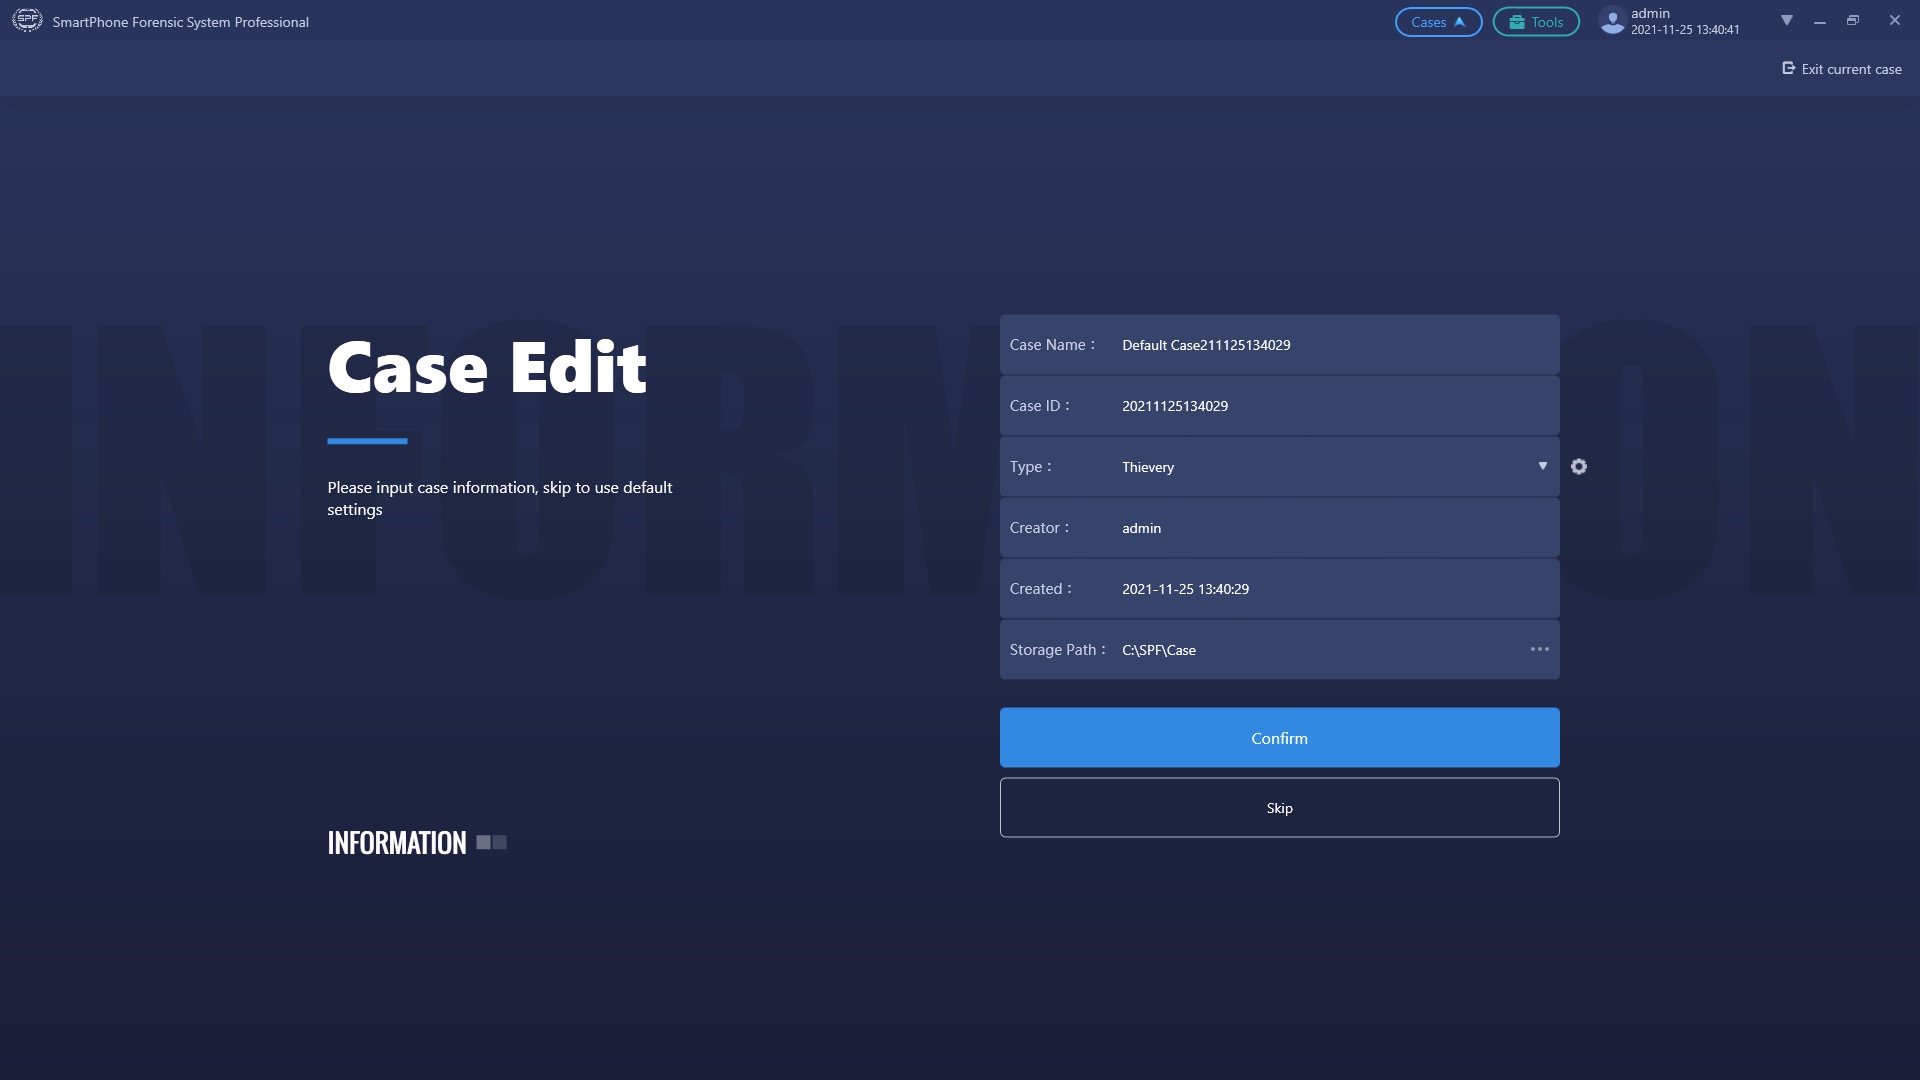
After clicking “New case”, case information will be required to be filled in.
Case Name
Case ID
Type
Creator
Date
Storage Path
However, we could also click “skip” to remain default settings and proceed with the further process.
When you’re happy with the filled information, click “confirm” and we’ll jump to the actual mobile forensics procedure.
Step-by-step Guide to Get Started with SPF Pro
Since SPF Pro is an intelligent easy-to-use, non-technical users friendly, and fully automatic mobile forensics device extraction solution, you will learn and grasp the basics in just a few minutes when you practice the same in the meanwhile.
When you’re ready to implement the mobile forensics process, make sure the below essentials have been under consideration.
Mobile device screen unlocked
USB debugging enabled(for Android)
Itunes installed & PC trusted (for IOS)
Stable device connection
Then, it’s time for collecting digital evidentiary data from a mobile device.
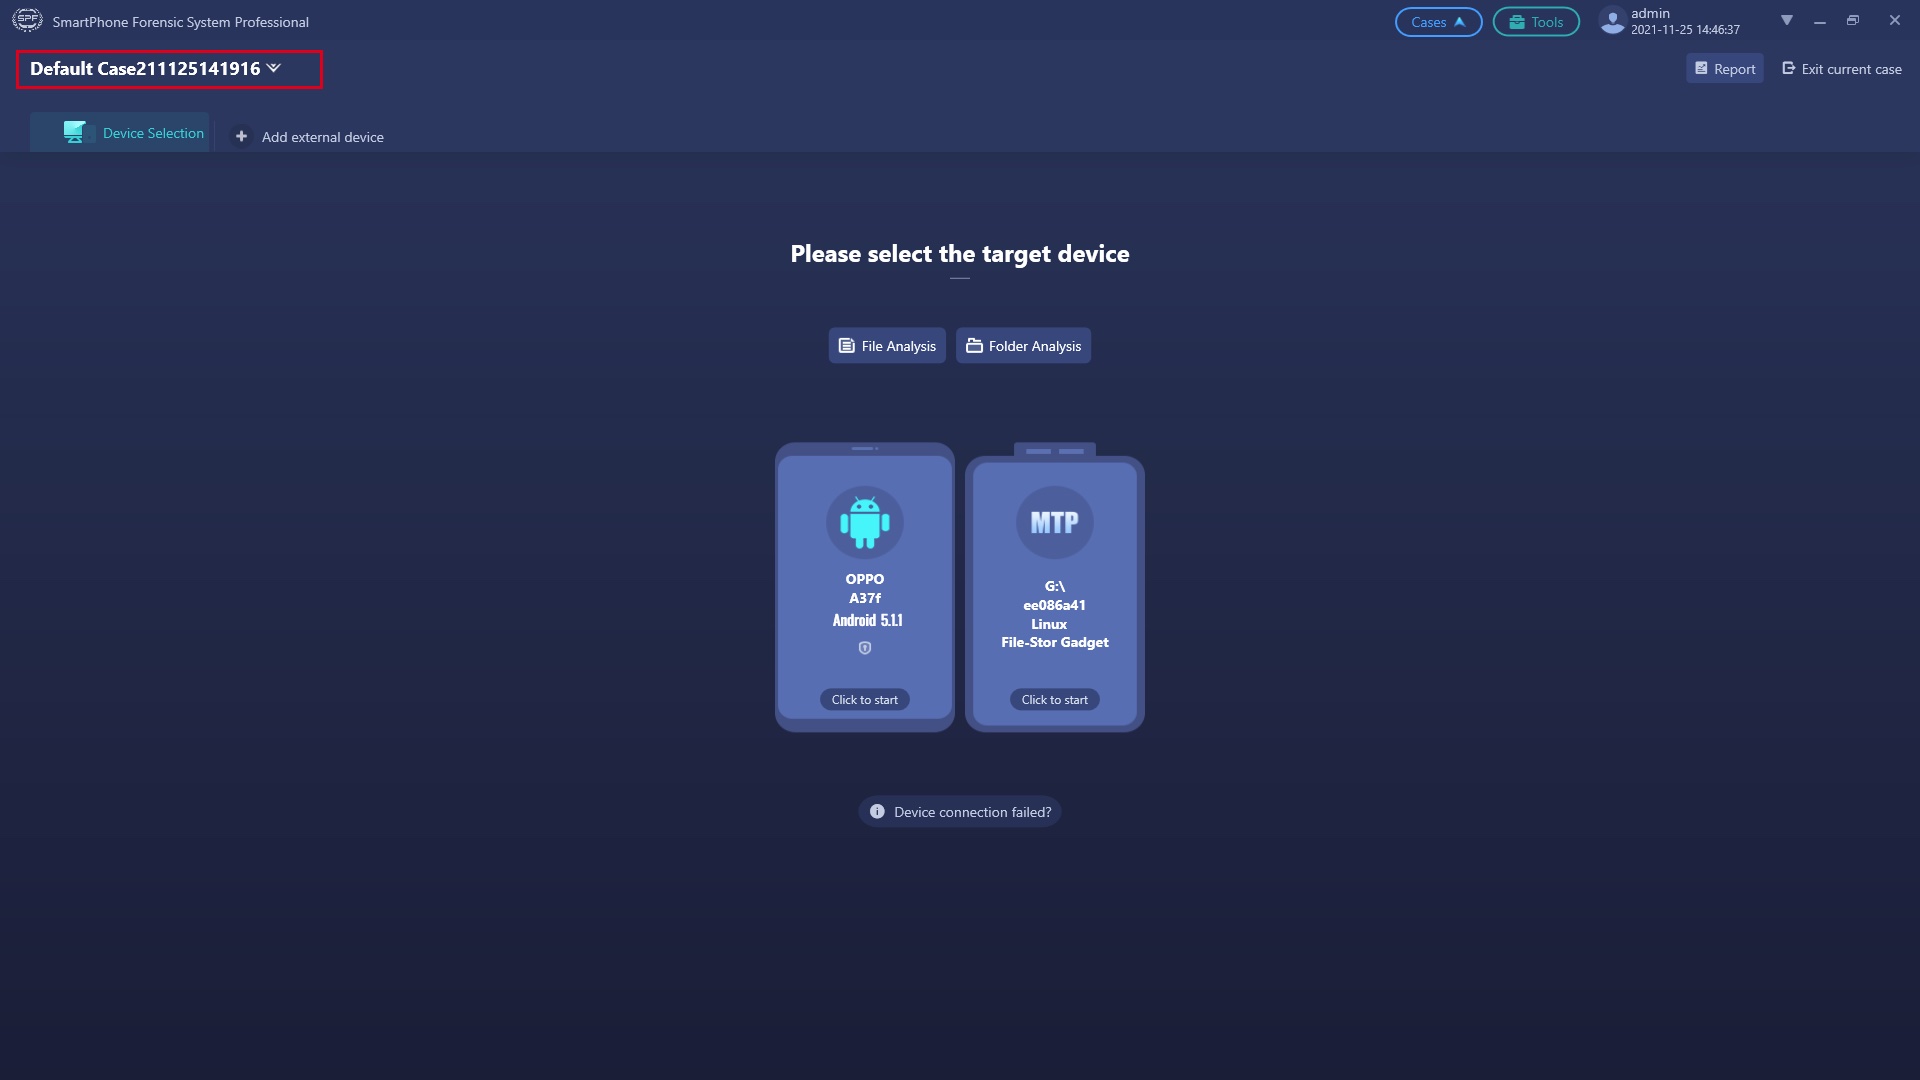
Step 1: Choose the targeted device to begin mobile forensics extraction
let’s choose this OPPO smartphone for the demonstration.
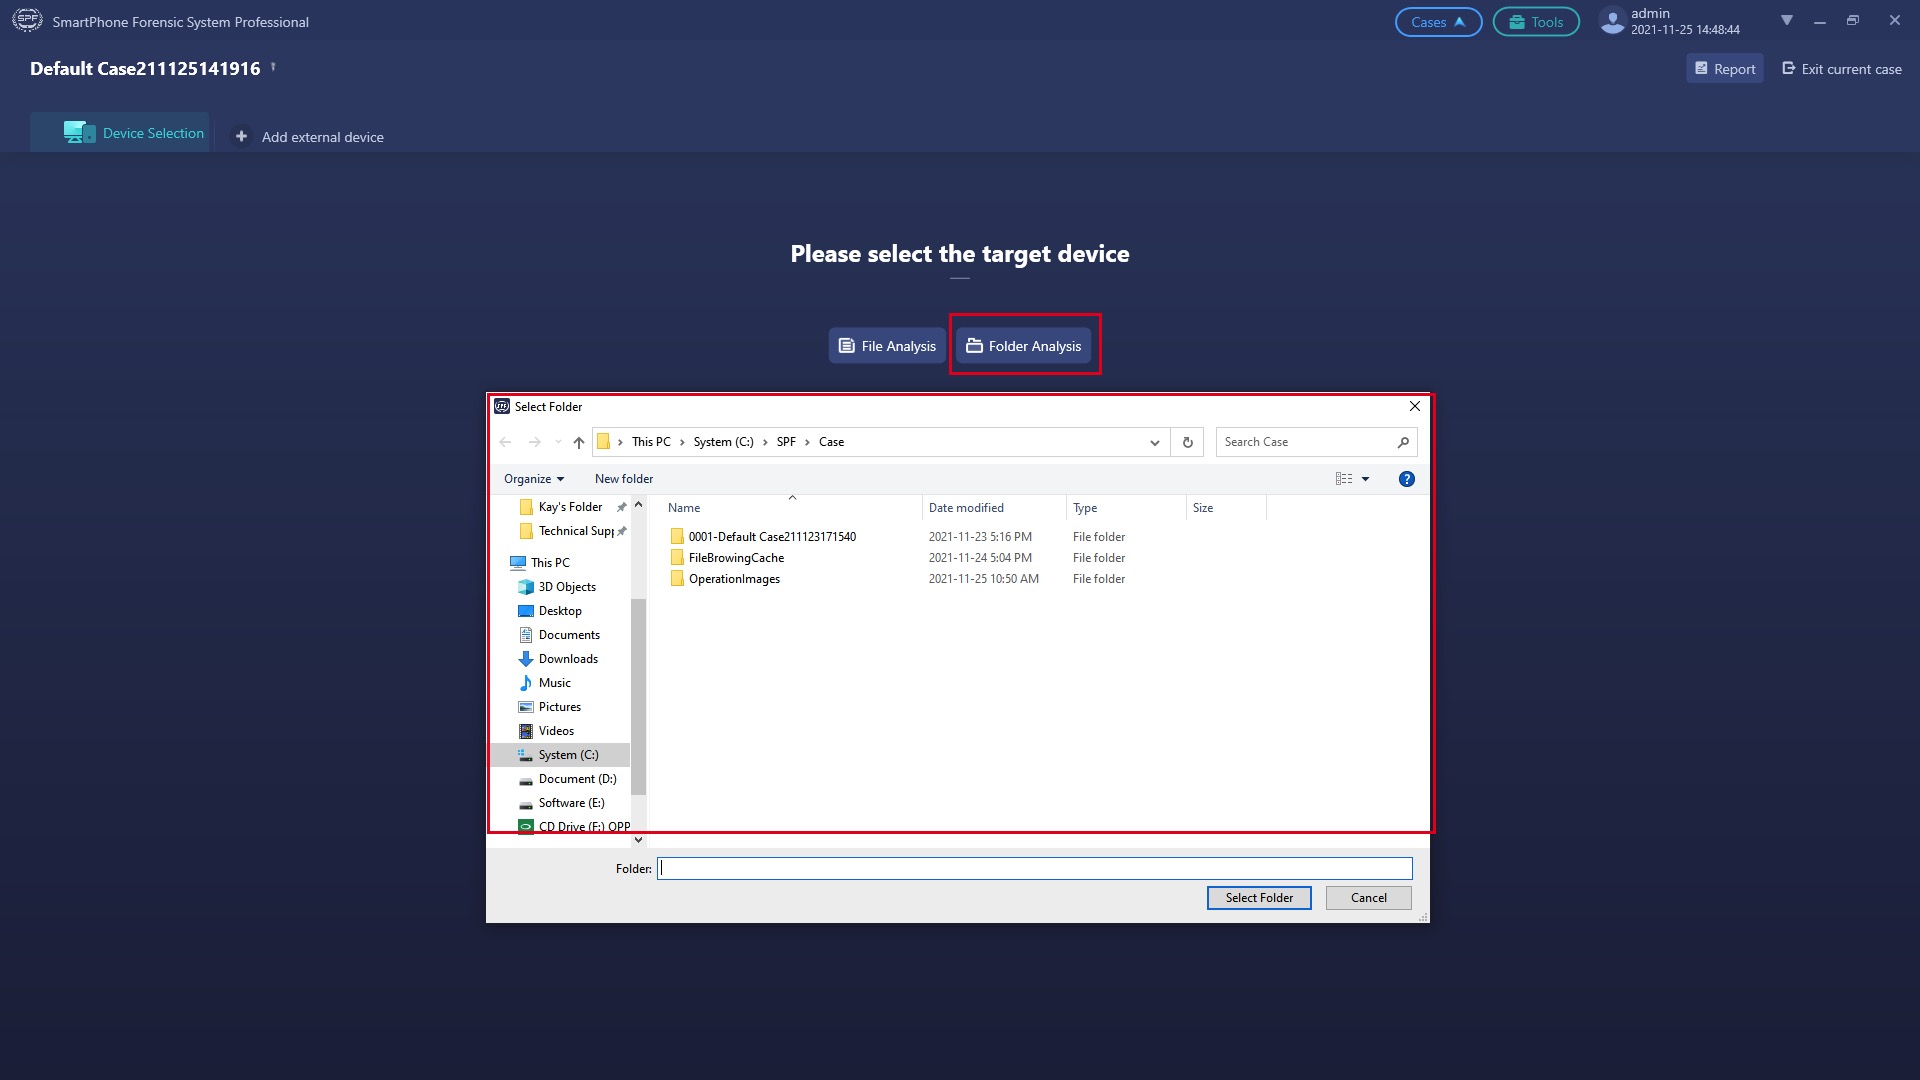
We have three options here.
Option 1: The graphical phone which is a physical mobile device that has connected to the PC (When there is more than one phone connected, more graphical phones will be shown up )
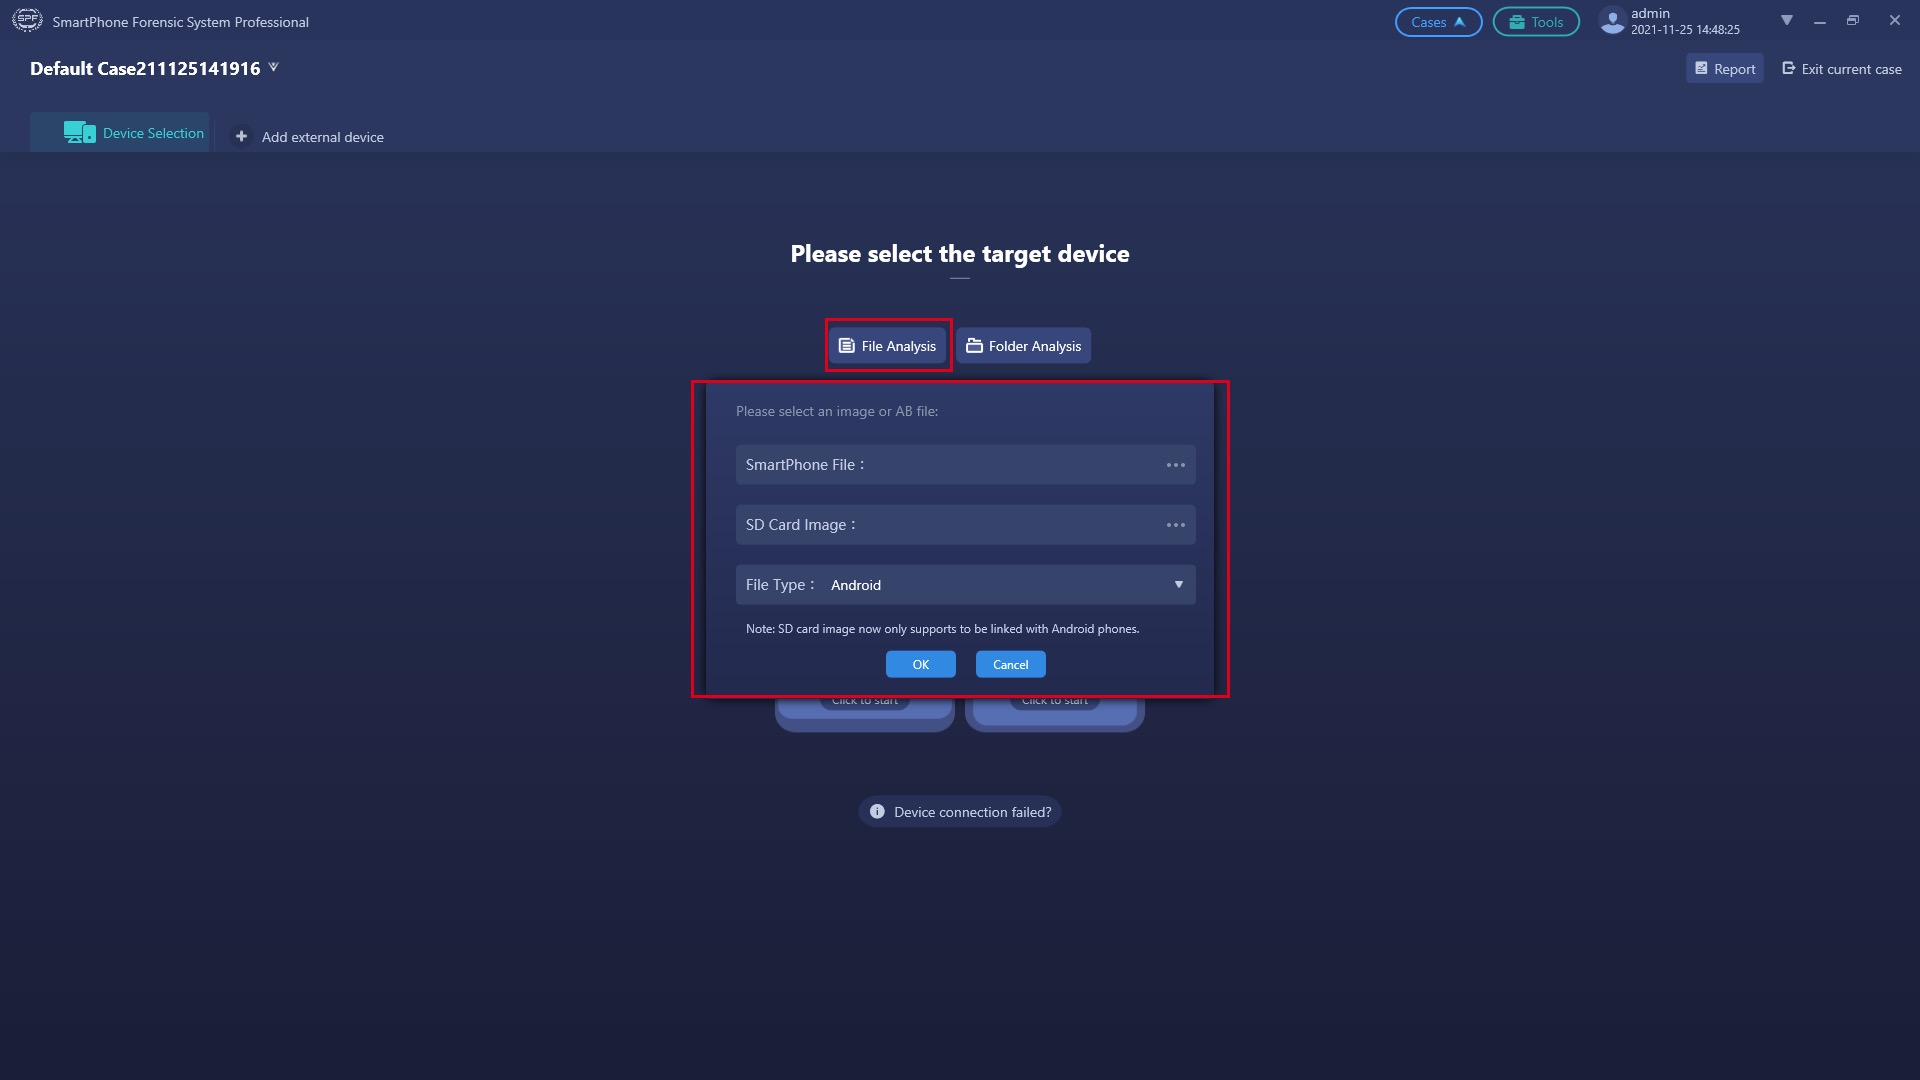
Option 2: File Analysis means specific existing digital evidentiary data to be analyzed (solely or additionally)
Option 3: Folder Analysis means the existing digital evidentiary data folder (which is also named image files ) selects the data backup folder as the target
e.g.: an image file(imaging) is normally indicating a complete backup (action) of a digital device by using their official backup assistant.
Step 2: Select automatic logical extraction
Select “Automatic Logical Extraction” when all shown information have been gone through by you and nothing stops you.
Quick tips: Automatic logic extraction is the most viable and intelligent extraction solution, which allows the software to automatically attempt utilizing the most possible way to extract successfully.
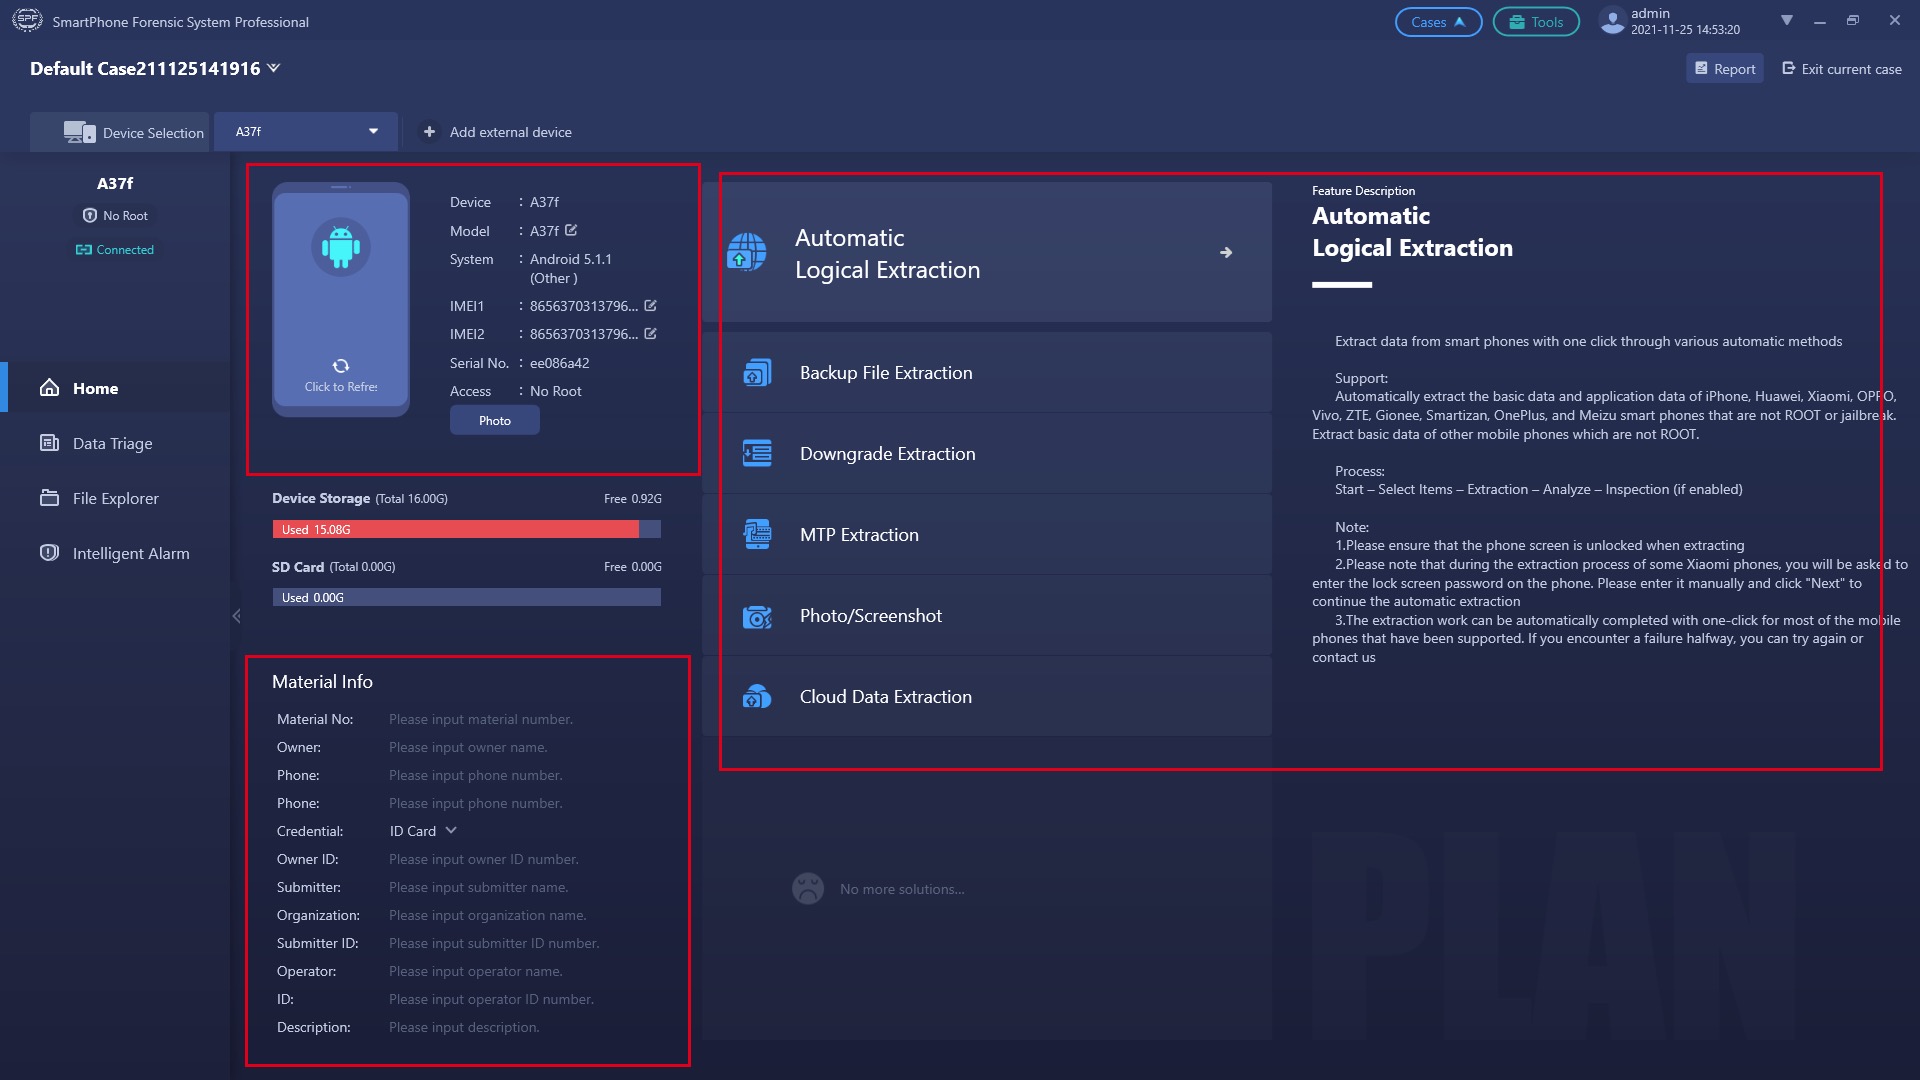
When we’ve selected the targeted physical phone or other extraction options in the last step, we’re supposed to be seeing corresponding technical information here.
Device: the name of the device
Model: the model of the device
System: The device operation system
IMFI: An IMEI stands for International Mobile Equipment Identity
Serial No: A serial number is a unique number assigned by a phone manufacturer (e.g. Apple) to help identify an individual device
Access: Root or unroot, which means the technical privilege access of a digital device
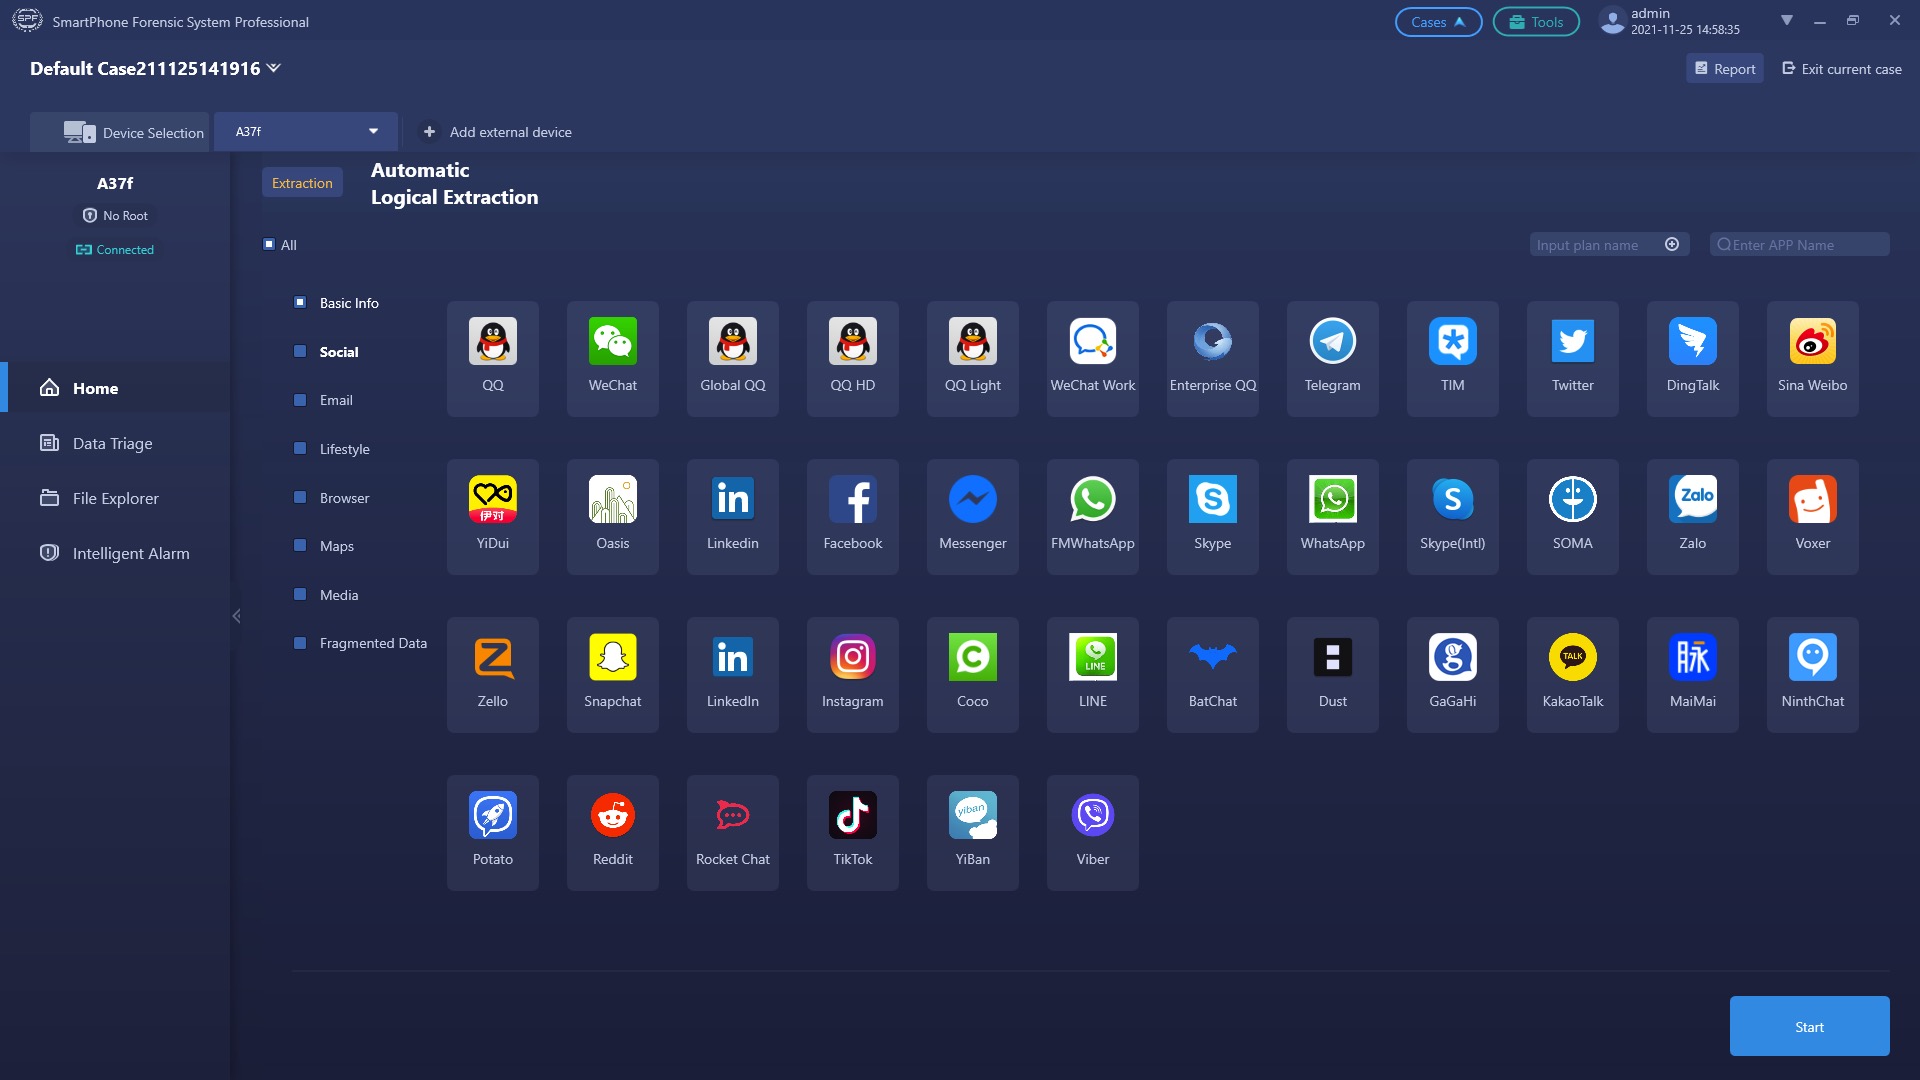
Step 3: Select the targeted data
Now select your targeted information for extraction.
When choosing the targeted data which is potentially containing case-relevant information, some misunderstandings and correct concepts about digital forensics are worth being known for any of your further steps from now on, since it’s going to correct your awareness to align your expectation of the forensic result.
When choosing targeted data, some basic Info of the device holders including age, geo, gender, transaction, geo footprint, social relations and time-based actions, etc are supposed to be under consideration.
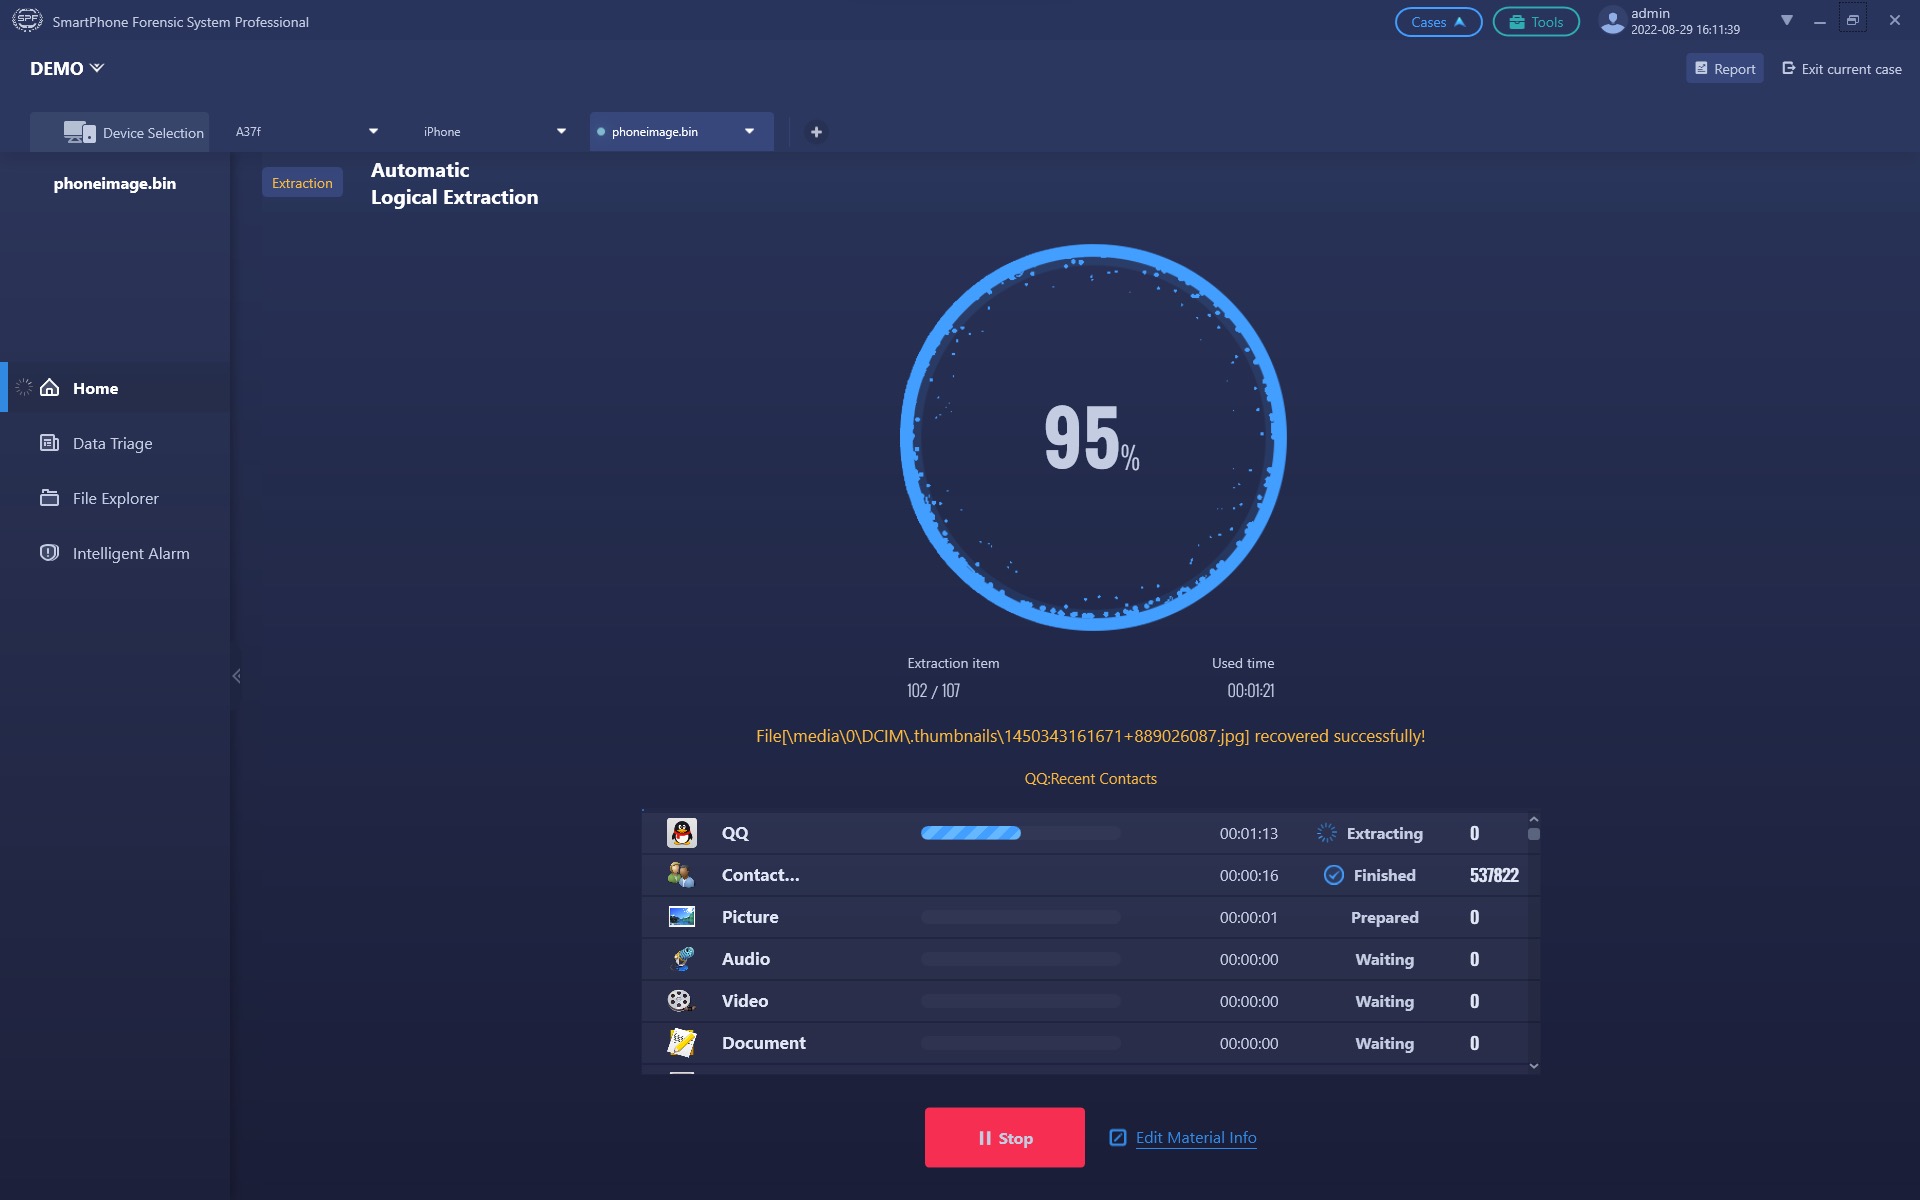
Step 4: Start the data extraction process
After selecting the targeted data, it’s time for the actual extraction process.
By clicking “start extraction”, the extraction will be carried out immediately.
(Normally, it’ll take 5-10 minutes and up to minutes which is based on the targeted forensic devices‘ data usage )
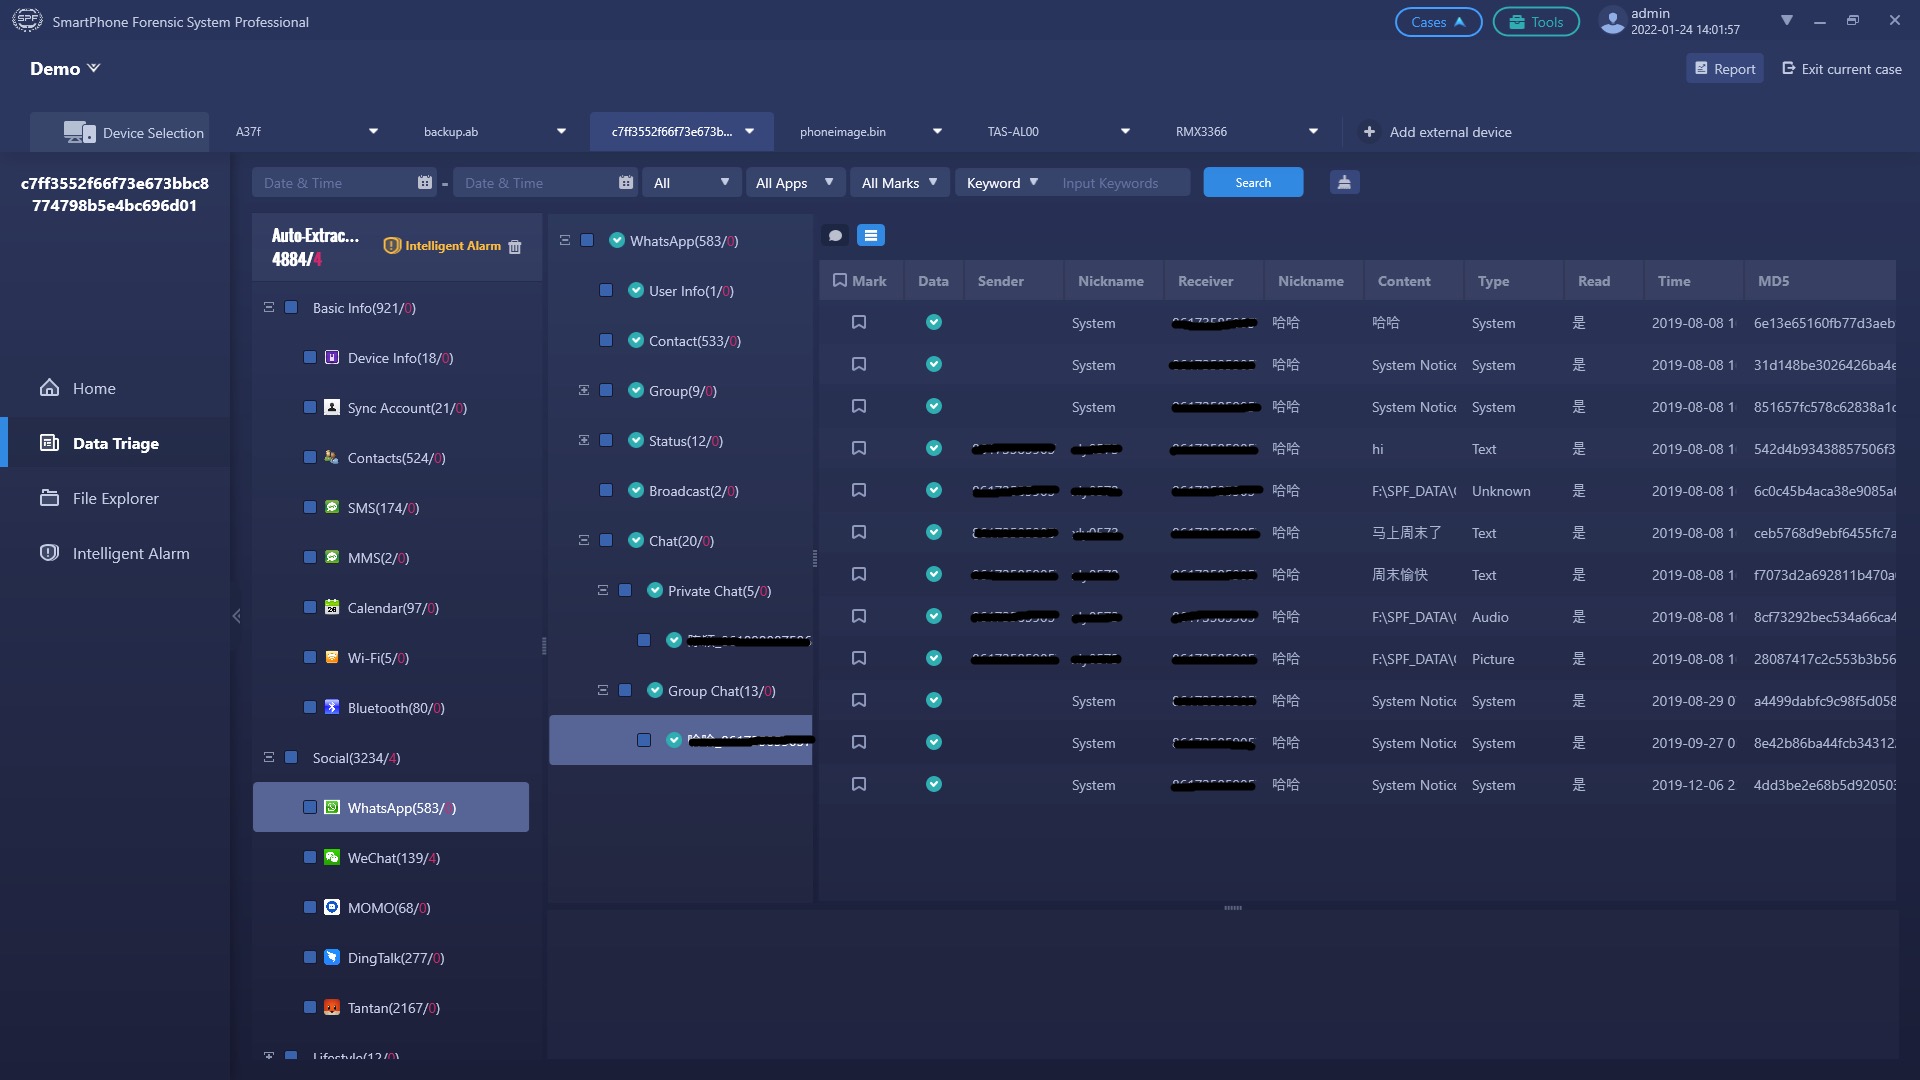
Step 5: Check out and preliminarily analyze the distracting data
When the data extraction process has finished, you’re supposed to be able to review the distracting data and analyze them to draw your conclusion specifically.
Click on the left navigation panel to switch between data categories and review the acquired data displayed on the right side of the window.
By preliminarily analyzing your acquired data, you’re going to clean up your mind for potential clues and unexpected likelihoods, mark down what first comes to your mind and it’ll help the big picture to be drawn down afterward.
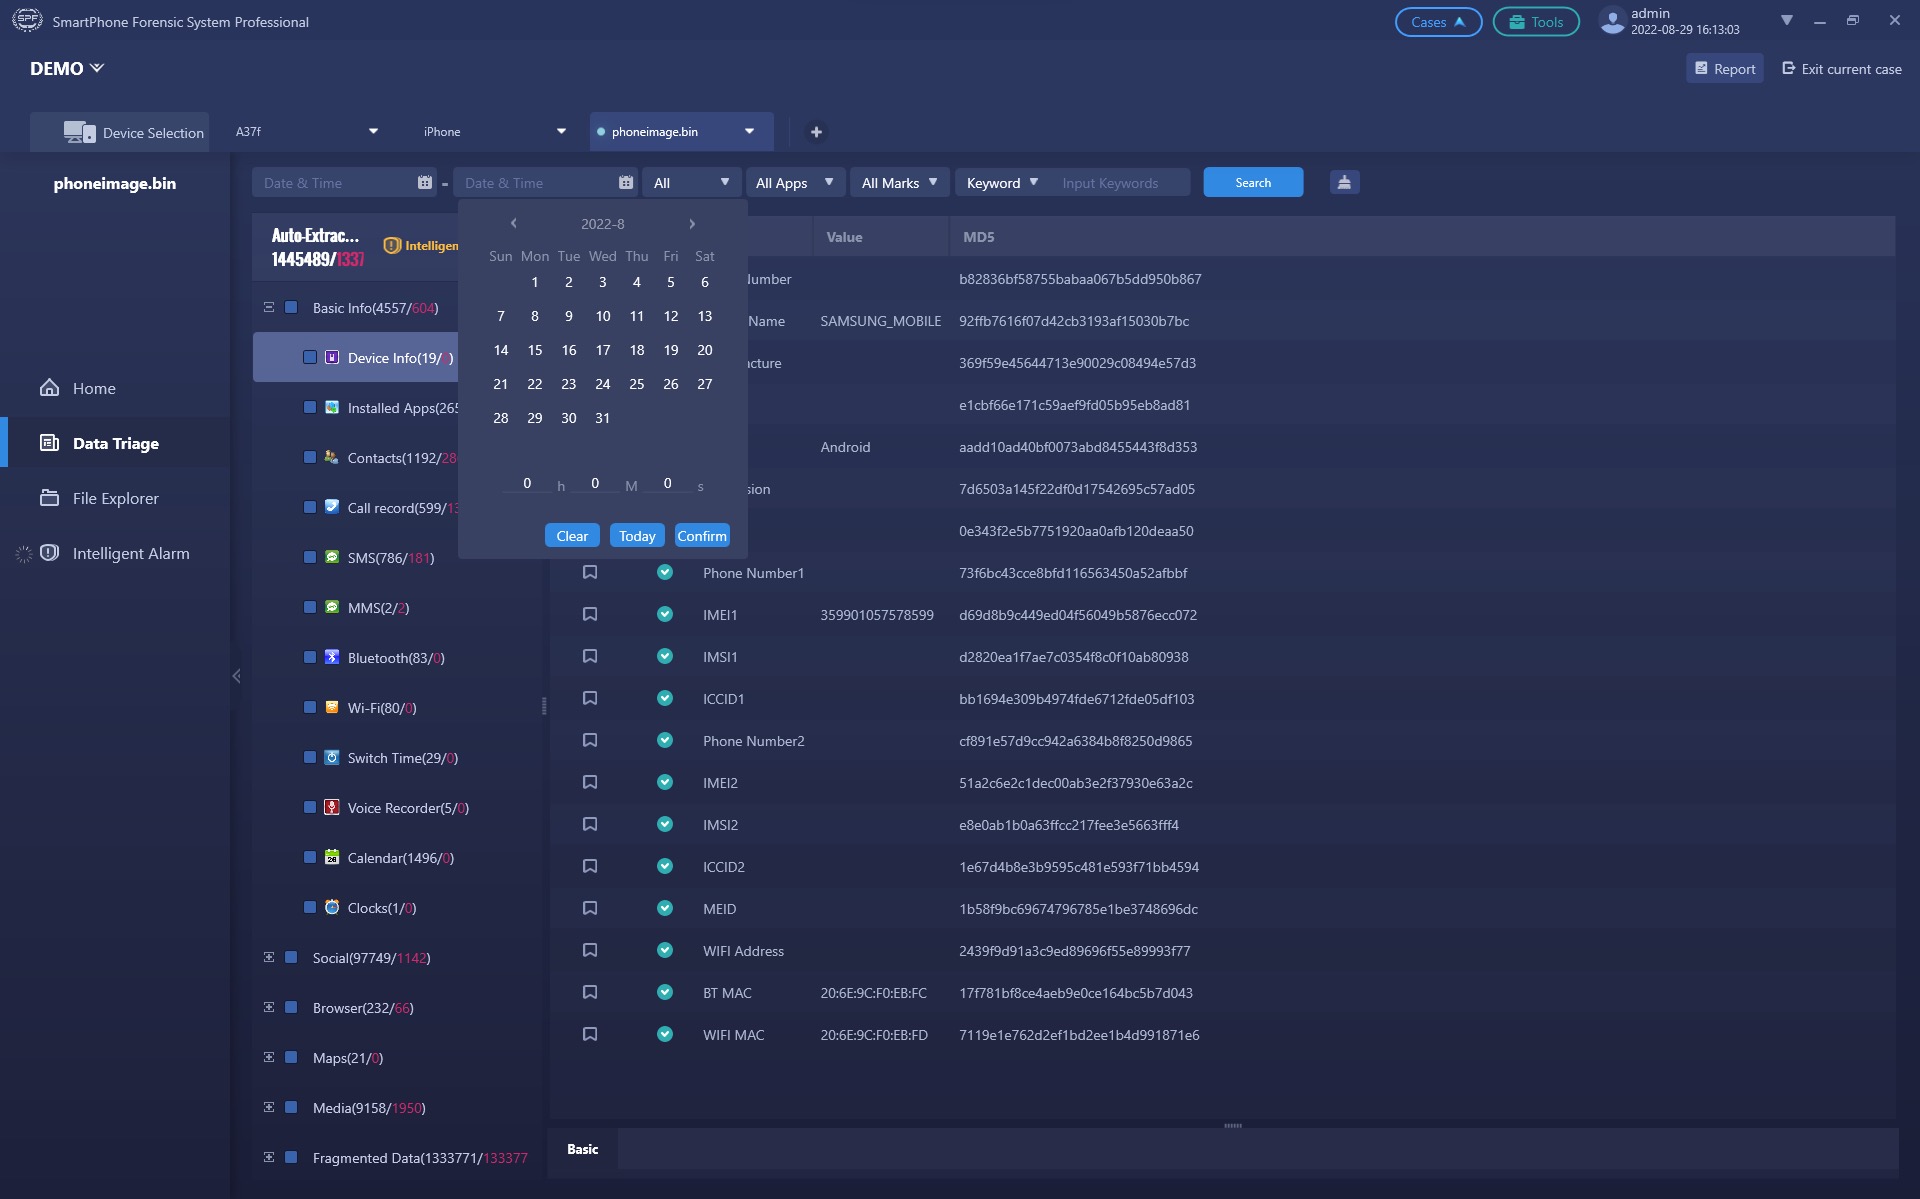
Meanwhile, when reviewing the data, using filters to help you quickly locate certain data is also recommended.
Date Period
Data status
Certain Apps
Keywords
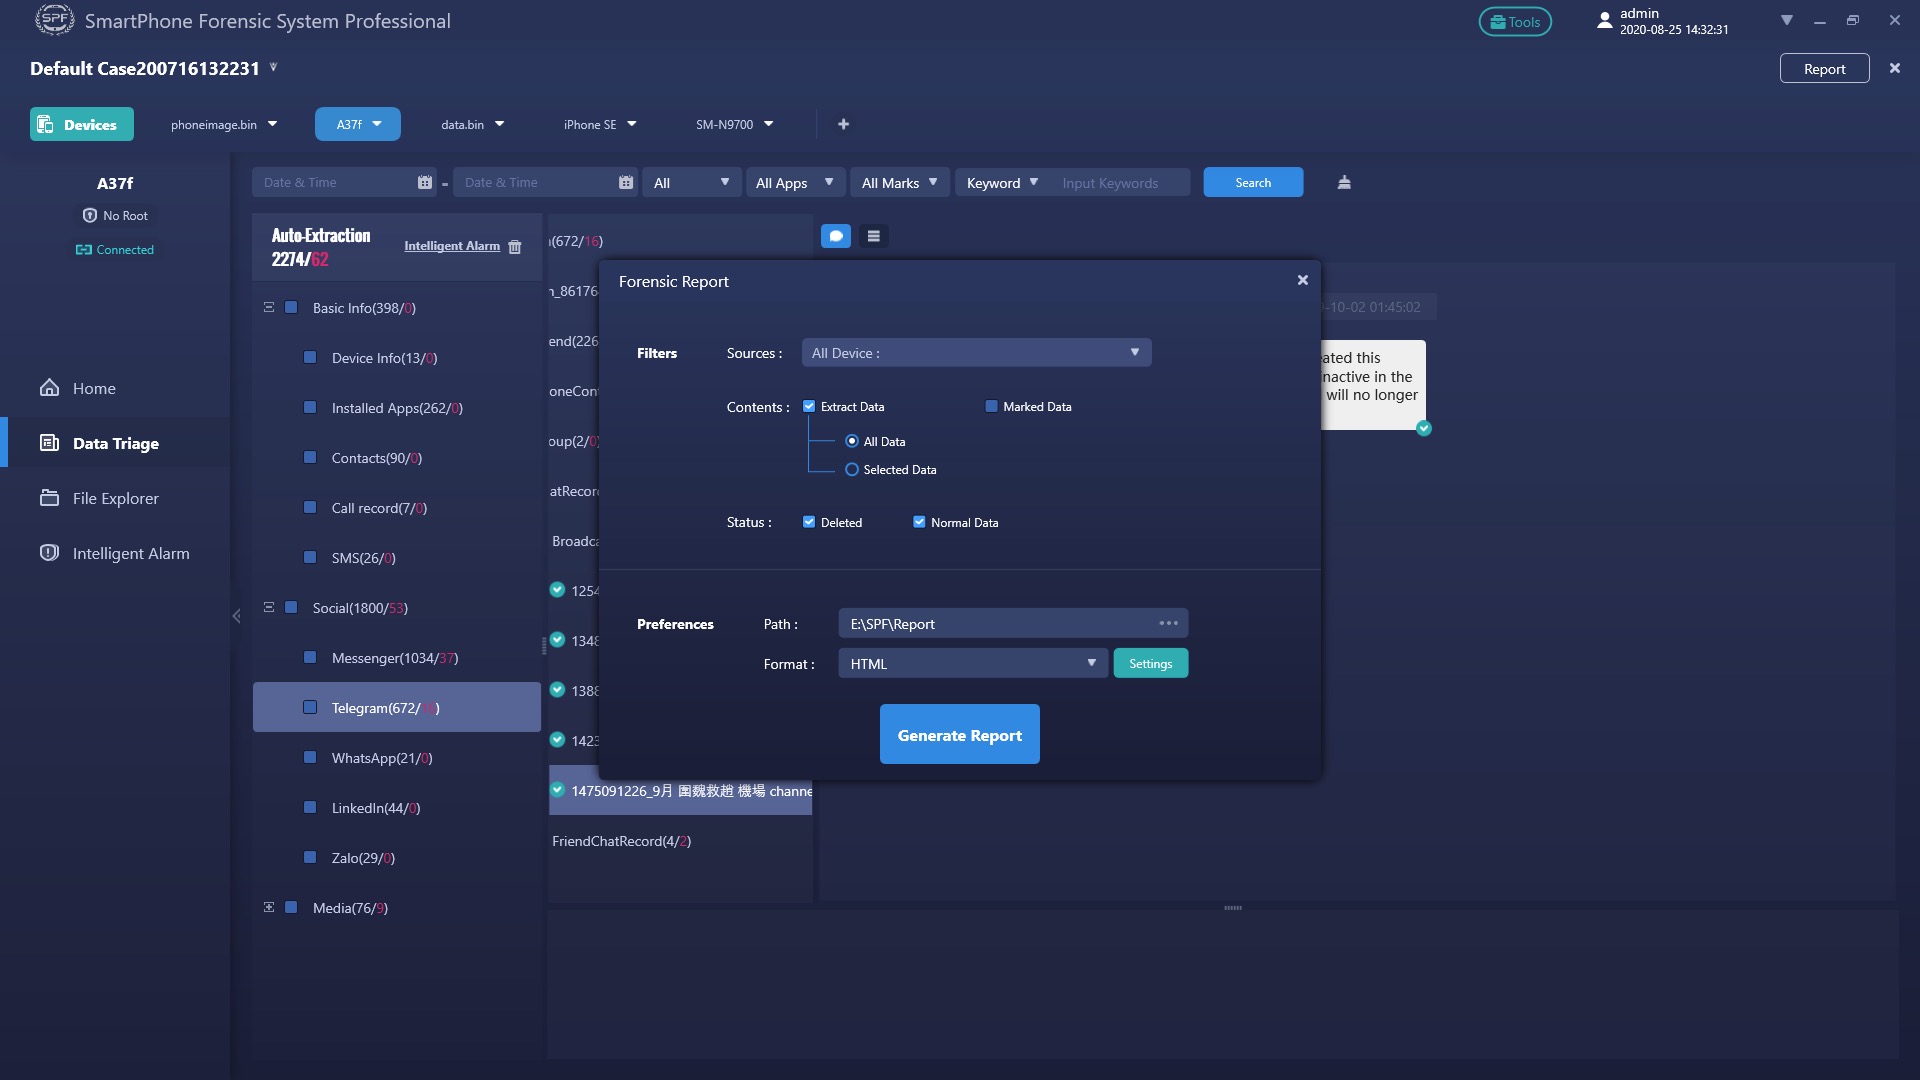
Mobile Forensics Report Generation
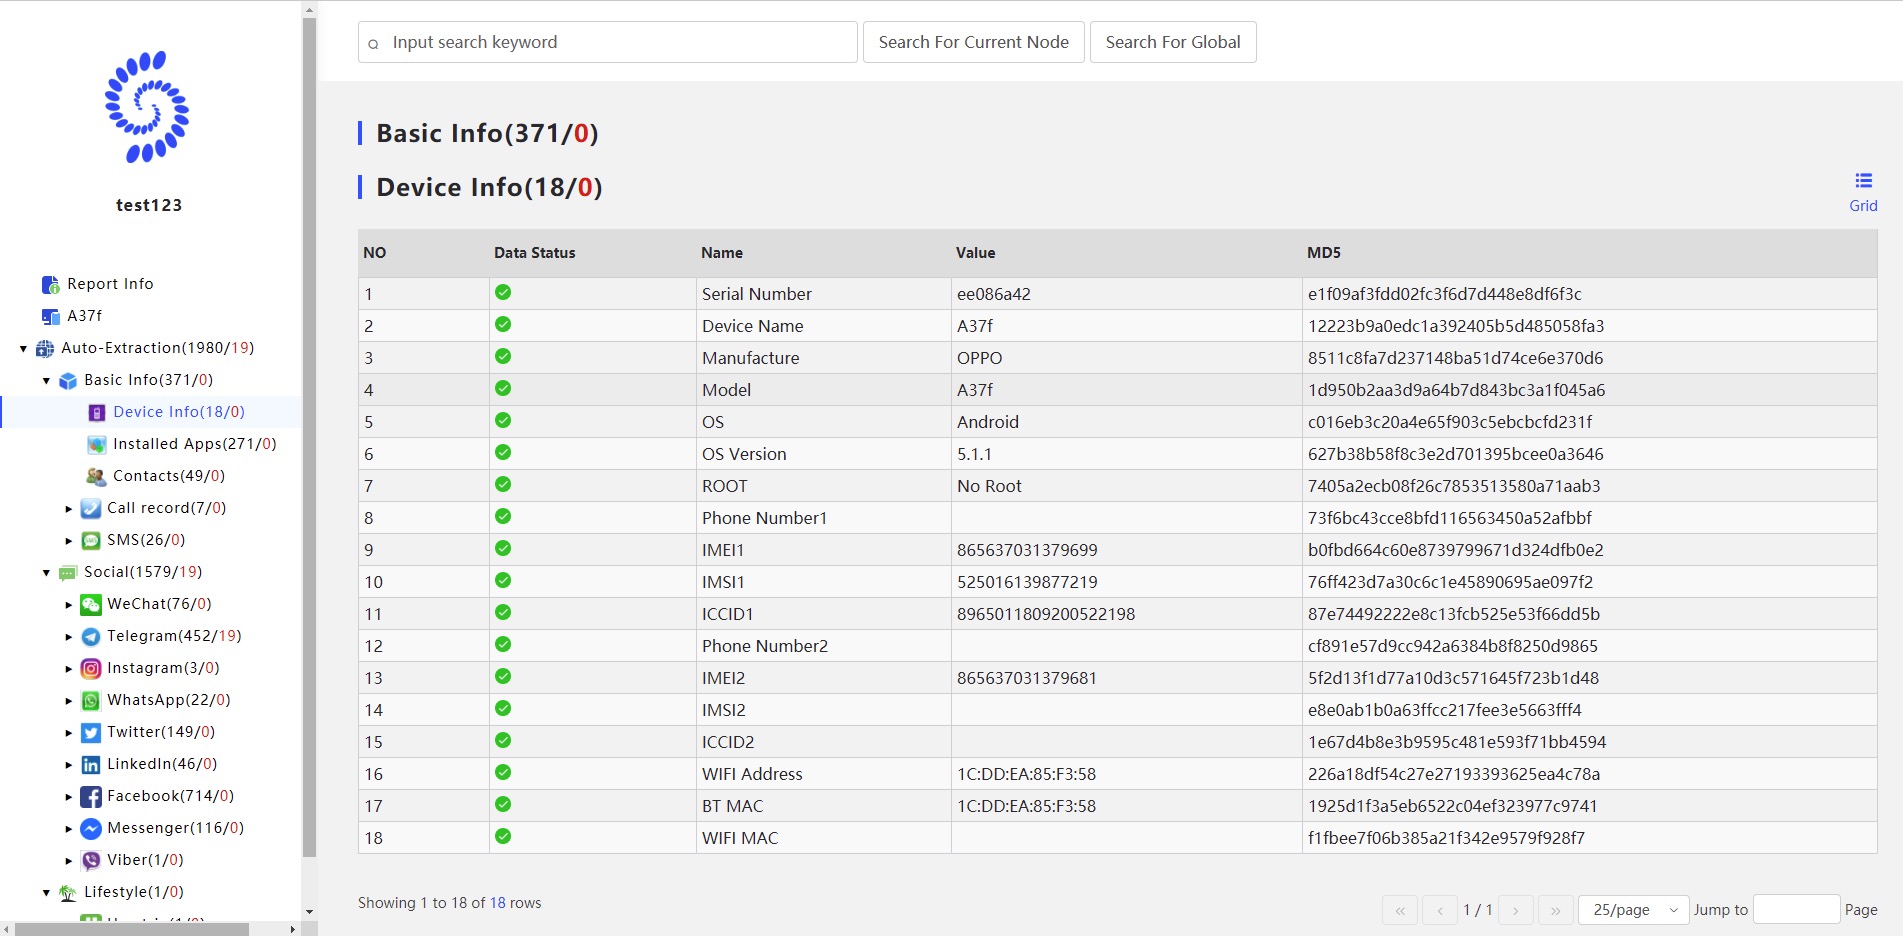
When the extraction and recovery process has been done, make sure to generate your forensic report.
As you can see, all the data has been extracted from the device. From now on, you could either review your extracted data for investigation purposes and submit them to court as digital evidence along with essential evidence submitted standards like analysis and conclusion requirements.
Summary
SPF Pro is an industry-grade mobile forensics tool that is especially non-technical friendly, meaning you should be ready to really apply your knowledge and practice to your specific case after reading today’s tutorial.
Incorporating your knowledge about crime investigation, mobile forensics investigation, and specific common sense in daily life, it’ll effectively and efficiently help you to crack more tough cases.